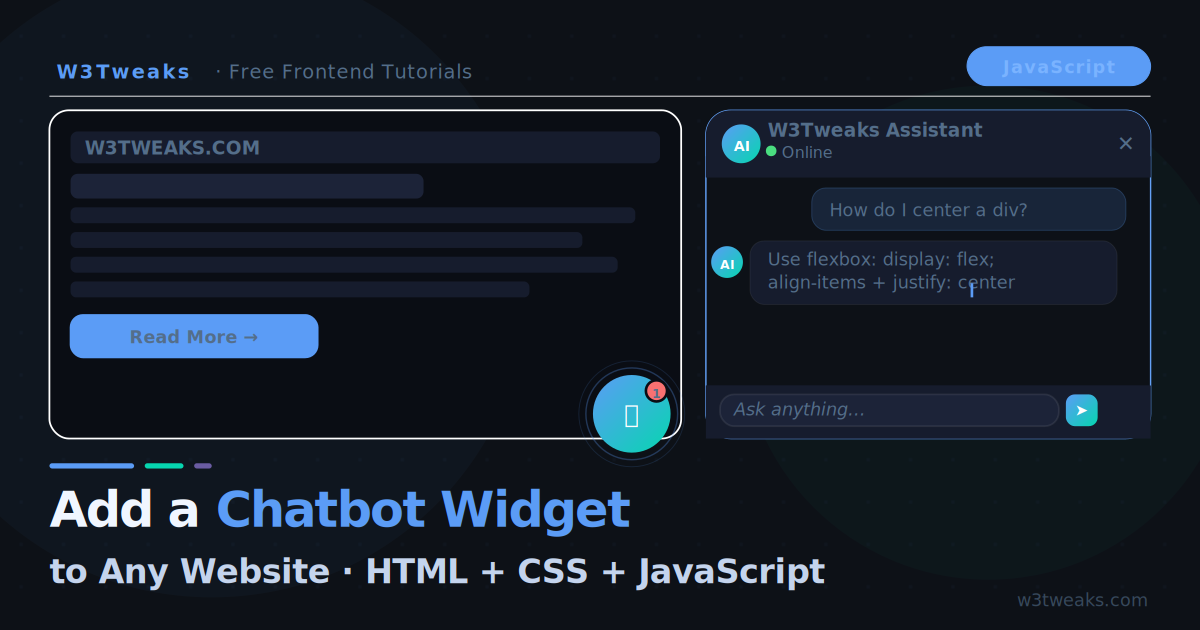
Every major website has one — a floating chat bubble in the bottom-right corner that opens into a support or AI assistant panel. They look complex but the core is straightforward: a button, a panel, and a connection to an AI API.
This tutorial builds the whole thing from scratch with zero dependencies. If you’ve already worked through our guide on calling the OpenAI API with vanilla JavaScript, the API plumbing here will look familiar — we’re just wrapping it in a polished UI. By the end you have a self-contained widget that:
- Floats in the bottom-right corner of any page
- Opens into a full chat panel with smooth animation
- Streams AI responses token by token
- Remembers the full conversation history
- Closes with Escape or the ✕ button
- Embeds into any website with one
<script>tag
Live Demo
Click the chat bubble. Enter your OpenAI API key when prompted. Switch colour themes using the strip at the bottom of the panel.
What We Are Building
┌─────────────────────────┐
│  W3Tweaks Assistant  ✕  │  ← Panel header
├─────────────────────────┤
│                         │
│  👤 How do I center a   │  ← User message
│     div in CSS?         │
│                         │
│  🤖 There are several   │  ← AI response (streaming)
│     ways to center...   │
│                         │
├─────────────────────────┤
│  [Type a message...] ➤  │  ← Input bar
└─────────────────────────┘
                      [💬]   ← Floating trigger button
Step 1 — The HTML Structure
The widget lives entirely outside your page content. Drop it just before </body>:
<!-- Chat Widget — place before </body> -->
<div id="chat-widget">

  <!-- Floating trigger bubble -->
  <button id="chat-trigger" aria-label="Open chat assistant">
    <svg id="chat-icon-open" xmlns="http://www.w3.org/2000/svg"
         width="24" height="24" viewBox="0 0 24 24"
         fill="none" stroke="currentColor" stroke-width="2">
      <path d="M21 15a2 2 0 0 1-2 2H7l-4 4V5a2 2 0 0 1 2-2h14a2 2 0 0 1 2 2z"/>
    </svg>
    <svg id="chat-icon-close" xmlns="http://www.w3.org/2000/svg"
         width="24" height="24" viewBox="0 0 24 24"
         fill="none" stroke="currentColor" stroke-width="2"
         style="display:none">
      <line x1="18" y1="6" x2="6" y2="18"/>
      <line x1="6" y1="6" x2="18" y2="18"/>
    </svg>
    <!-- Unread badge -->
    <span id="chat-badge" style="display:none">1</span>
  </button>

  <!-- Chat panel -->
  <div id="chat-panel" aria-hidden="true">

    <!-- Header -->
    <div id="chat-header">
      <div id="chat-header-info">
        <div id="chat-avatar">AI</div>
        <div>
          <div id="chat-name">W3Tweaks Assistant</div>
          <div id="chat-status">
            <span id="status-dot"></span>
            <span id="status-text">Online</span>
          </div>
        </div>
      </div>
      <button id="chat-close" aria-label="Close chat">✕</button>
    </div>

    <!-- Messages -->
    <div id="chat-messages" role="log" aria-live="polite">
      <!-- Messages injected here by JS -->
    </div>

    <!-- Input bar -->
    <div id="chat-input-bar">
      <textarea
        id="chat-input"
        placeholder="Ask anything…"
        rows="1"
        aria-label="Chat message"
      ></textarea>
      <button id="chat-send" aria-label="Send message">
        <svg xmlns="http://www.w3.org/2000/svg" width="16" height="16"
             viewBox="0 0 24 24" fill="none"
             stroke="currentColor" stroke-width="2.5">
          <line x1="22" y1="2" x2="11" y2="13"/>
          <polygon points="22 2 15 22 11 13 2 9 22 2"/>
        </svg>
      </button>
    </div>

  </div>
</div>
Step 2 — The CSS
The widget uses fixed positioning and CSS custom properties so it can be themed without touching the core styles:
/* ── Widget design tokens ── */
#chat-widget {
  --cw-primary:    #5b9cf6;
  --cw-primary-g:  linear-gradient(135deg, #5b9cf6, #06d6b0);
  --cw-bg:         #0d1117;
  --cw-surface:    #161c2d;
  --cw-surface2:   #1c2338;
  --cw-border:     rgba(255,255,255,.09);
  --cw-text:       #f0f6ff;
  --cw-body:       #c4d4ed;
  --cw-muted:      #546e8a;
  --cw-radius:     14px;
  --cw-w:          360px;
  --cw-h:          520px;

  /* Positioning */
  position: fixed;
  bottom: 24px;
  right: 24px;
  z-index: 9999;
  font-family: 'Plus Jakarta Sans', system-ui, sans-serif;
  font-size: 14px;
}

/* ── Trigger bubble ── */
#chat-trigger {
  width: 56px;
  height: 56px;
  border-radius: 50%;
  border: none;
  background: var(--cw-primary-g);
  color: #fff;
  cursor: pointer;
  display: flex;
  align-items: center;
  justify-content: center;
  box-shadow: 0 4px 20px rgba(91,156,246,.4);
  transition: transform .2s, box-shadow .2s;
  position: relative;
}
#chat-trigger:hover {
  transform: scale(1.08);
  box-shadow: 0 6px 28px rgba(91,156,246,.55);
}
#chat-trigger:active { transform: scale(.96) }

/* Unread badge */
#chat-badge {
  position: absolute;
  top: -3px;
  right: -3px;
  width: 18px;
  height: 18px;
  border-radius: 50%;
  background: #f87171;
  color: #fff;
  font-size: 10px;
  font-weight: 800;
  display: flex;
  align-items: center;
  justify-content: center;
  border: 2px solid var(--cw-bg);
}

/* Pulse animation on trigger when panel is closed */
#chat-trigger::after {
  content: '';
  position: absolute;
  inset: -4px;
  border-radius: 50%;
  border: 2px solid var(--cw-primary);
  animation: cw-pulse 2.5s ease-out infinite;
  opacity: 0;
}
@keyframes cw-pulse {
  0%   { transform: scale(.9); opacity: .6 }
  100% { transform: scale(1.4); opacity: 0 }
}

/* ── Chat panel ── */
#chat-panel {
  position: absolute;
  bottom: 68px;
  right: 0;
  width: var(--cw-w);
  height: var(--cw-h);
  background: var(--cw-bg);
  border: 1px solid var(--cw-border);
  border-radius: var(--cw-radius);
  display: flex;
  flex-direction: column;
  overflow: hidden;
  box-shadow: 0 16px 48px rgba(0,0,0,.6), 0 0 0 1px rgba(91,156,246,.1);

  /* Hidden by default */
  opacity: 0;
  transform: translateY(12px) scale(.97);
  pointer-events: none;
  transition: opacity .25s ease, transform .25s ease;
}
#chat-panel.open {
  opacity: 1;
  transform: translateY(0) scale(1);
  pointer-events: all;
}

/* ── Header ── */
#chat-header {
  padding: 14px 16px;
  background: var(--cw-surface);
  border-bottom: 1px solid var(--cw-border);
  display: flex;
  align-items: center;
  justify-content: space-between;
  flex-shrink: 0;
}
#chat-header-info { display: flex; align-items: center; gap: 10px }
#chat-avatar {
  width: 36px;
  height: 36px;
  border-radius: 50%;
  background: var(--cw-primary-g);
  display: flex;
  align-items: center;
  justify-content: center;
  font-size: 12px;
  font-weight: 800;
  color: #fff;
  flex-shrink: 0;
  box-shadow: 0 0 12px rgba(91,156,246,.35);
}
#chat-name {
  font-size: 14px;
  font-weight: 700;
  color: var(--cw-text);
}
#chat-status {
  display: flex;
  align-items: center;
  gap: 5px;
  font-size: 11.5px;
  color: var(--cw-muted);
  margin-top: 1px;
}
#status-dot {
  width: 6px;
  height: 6px;
  border-radius: 50%;
  background: #4ade80;
  animation: cw-blink 2s ease-in-out infinite;
}
@keyframes cw-blink { 0%,100%{opacity:1} 50%{opacity:.4} }
#chat-close {
  background: none;
  border: none;
  color: var(--cw-muted);
  font-size: 18px;
  cursor: pointer;
  padding: 4px 6px;
  border-radius: 6px;
  line-height: 1;
  transition: color .15s, background .15s;
}
#chat-close:hover { color: var(--cw-text); background: rgba(255,255,255,.07) }

/* ── Messages ── */
#chat-messages {
  flex: 1;
  overflow-y: auto;
  padding: 14px;
  display: flex;
  flex-direction: column;
  gap: 12px;
  scroll-behavior: smooth;
}
#chat-messages::-webkit-scrollbar { width: 4px }
#chat-messages::-webkit-scrollbar-thumb { background: var(--cw-surface2); border-radius: 4px }

.cw-msg {
  display: flex;
  gap: 8px;
  align-items: flex-start;
  animation: cw-msg-in .2s ease both;
}
@keyframes cw-msg-in {
  from { opacity: 0; transform: translateY(8px) }
}
.cw-msg.user { flex-direction: row-reverse }

.cw-av {
  width: 28px;
  height: 28px;
  border-radius: 50%;
  flex-shrink: 0;
  display: flex;
  align-items: center;
  justify-content: center;
  font-size: 10px;
  font-weight: 800;
  color: #fff;
}
.cw-av.ai   { background: var(--cw-primary-g) }
.cw-av.user { background: linear-gradient(135deg,#a78bfa,#5b9cf6) }

.cw-bubble {
  max-width: 82%;
  padding: 9px 12px;
  border-radius: 11px;
  font-size: 13.5px;
  line-height: 1.65;
  white-space: pre-wrap;
  word-break: break-word;
}
.cw-bubble.user {
  background: rgba(91,156,246,.15);
  border: 1px solid rgba(91,156,246,.25);
  color: #dce8ff;
  border-radius: 11px 2px 11px 11px;
}
.cw-bubble.ai {
  background: var(--cw-surface);
  border: 1px solid var(--cw-border);
  color: var(--cw-body);
  border-radius: 2px 11px 11px 11px;
}

/* Cursor */
.cw-cursor {
  display: inline-block;
  width: 2px;
  height: 1em;
  background: var(--cw-primary);
  vertical-align: text-bottom;
  margin-left: 1px;
  animation: cw-cur .7s step-end infinite;
}
@keyframes cw-cur { 0%,100%{opacity:1} 50%{opacity:0} }

/* Thinking dots */
.cw-thinking { display: flex; gap: 4px; padding: 3px 0 }
.cw-dot {
  width: 6px; height: 6px; border-radius: 50%;
  background: var(--cw-primary);
  animation: cw-dot .9s ease-in-out infinite;
}
.cw-dot:nth-child(2) { animation-delay: .15s }
.cw-dot:nth-child(3) { animation-delay: .3s  }
@keyframes cw-dot {
  0%,60%,100% { transform:translateY(0); opacity:.35 }
  30%          { transform:translateY(-5px); opacity:1 }
}

/* ── Input bar ── */
#chat-input-bar {
  padding: 10px 12px;
  background: var(--cw-surface);
  border-top: 1px solid var(--cw-border);
  display: flex;
  gap: 8px;
  align-items: flex-end;
  flex-shrink: 0;
}
#chat-input {
  flex: 1;
  background: var(--cw-surface2);
  border: 1px solid var(--cw-border);
  border-radius: 10px;
  padding: 9px 12px;
  font-size: 13.5px;
  font-family: inherit;
  color: var(--cw-text);
  resize: none;
  outline: none;
  max-height: 100px;
  overflow-y: auto;
  line-height: 1.5;
  transition: border-color .18s;
}
#chat-input:focus { border-color: rgba(91,156,246,.5) }
#chat-input::placeholder { color: var(--cw-muted) }
#chat-send {
  width: 38px;
  height: 38px;
  border-radius: 10px;
  border: none;
  background: var(--cw-primary-g);
  color: #fff;
  cursor: pointer;
  display: flex;
  align-items: center;
  justify-content: center;
  flex-shrink: 0;
  transition: opacity .18s, transform .12s;
}
#chat-send:hover   { opacity: .88 }
#chat-send:disabled{ opacity: .35; cursor: not-allowed }
#chat-send:active  { transform: scale(.94) }

/* ── Responsive ── */
@media (max-width: 480px) {
  #chat-widget { --cw-w: calc(100vw - 24px); right: 12px; bottom: 12px }
  #chat-panel  { bottom: 64px }
}
Step 3 — The JavaScript
The JavaScript wires up the open/close behavior, captures user input, calls the OpenAI Chat Completions endpoint with stream: true, and renders tokens as they arrive using ReadableStream. If the token-by-token rendering loop is new to you, the deep-dive in Build a ChatGPT-style streaming text effect with JavaScript walks through the underlying technique used here.
(function () {
'use strict';
// ── Config — edit these ──
const CONFIG = {
apiKey: '', // Set at runtime — never hardcode in production
model: 'gpt-4o-mini',
systemPrompt:'You are a helpful frontend development assistant for W3Tweaks. Answer questions about CSS, JavaScript, and HTML concisely and practically. Keep answers under 150 words unless code is needed.',
welcomeMsg: 'Hi! I\'m the W3Tweaks assistant. Ask me anything about CSS, JavaScript, or HTML. 👋',
};
// ── State ──
const history = [];
let isOpen = false;
let isBusy = false;
// ── Elements ──
const trigger = document.getElementById('chat-trigger');
const panel = document.getElementById('chat-panel');
const messages = document.getElementById('chat-messages');
const input = document.getElementById('chat-input');
const sendBtn = document.getElementById('chat-send');
const closeBtn = document.getElementById('chat-close');
const badge = document.getElementById('chat-badge');
const iconOpen = document.getElementById('chat-icon-open');
const iconClose= document.getElementById('chat-icon-close');
const statusTxt= document.getElementById('status-text');
// ── Open / close ──
function togglePanel() {
isOpen = !isOpen;
panel.classList.toggle('open', isOpen);
panel.setAttribute('aria-hidden', String(!isOpen));
iconOpen.style.display = isOpen ? 'none' : 'block';
iconClose.style.display = isOpen ? 'block' : 'none';
badge.style.display = 'none';
if (isOpen) {
input.focus();
scrollBottom();
// Show welcome message on first open
if (history.length === 0) addAIMessage(CONFIG.welcomeMsg, false);
}
}
trigger.addEventListener('click', togglePanel);
closeBtn.addEventListener('click', () => { isOpen = true; togglePanel() });
// Close on Escape
document.addEventListener('keydown', e => {
if (e.key === 'Escape' && isOpen) { isOpen = true; togglePanel() }
});
// ── Message rendering ──
function addUserMessage(text) {
const div = document.createElement('div');
div.className = 'cw-msg user';
div.innerHTML = `
<div class="cw-av user">U</div>
<div class="cw-bubble user">${esc(text)}</div>
`;
messages.appendChild(div);
scrollBottom();
}
function addThinkingDots() {
const div = document.createElement('div');
div.className = 'cw-msg';
div.id = 'cw-thinking';
div.innerHTML = `
<div class="cw-av ai">AI</div>
<div class="cw-bubble ai">
<div class="cw-thinking">
<div class="cw-dot"></div>
<div class="cw-dot"></div>
<div class="cw-dot"></div>
</div>
</div>
`;
messages.appendChild(div);
scrollBottom();
return div;
}
function addAIMessage(text, stream = true) {
// Remove thinking indicator
document.getElementById('cw-thinking')?.remove();
const div = document.createElement('div');
div.className = 'cw-msg';
const textSpan = document.createElement('span');
const cursorSpan = document.createElement('span');
cursorSpan.className = 'cw-cursor';
const bubble = document.createElement('div');
bubble.className = 'cw-bubble ai';
bubble.appendChild(textSpan);
if (stream) bubble.appendChild(cursorSpan);
div.innerHTML = '<div class="cw-av ai">AI</div>';
div.appendChild(bubble);
messages.appendChild(div);
scrollBottom();
if (!stream) {
textSpan.textContent = text;
return;
}
return { textSpan, cursorSpan };
}
function scrollBottom() {
messages.scrollTop = messages.scrollHeight;
}
// ── Send message ──
async function send() {
const text = input.value.trim();
if (!text || isBusy) return;
const apiKey = CONFIG.apiKey || prompt('Enter your OpenAI API key:');
if (!apiKey) return;
CONFIG.apiKey = apiKey;
isBusy = true;
sendBtn.disabled = true;
input.value = '';
autoResize(input);
addUserMessage(text);
history.push({ role: 'user', content: text });
statusTxt.textContent = 'Typing…';
addThinkingDots();
try {
const res = await fetch('https://api.openai.com/v1/chat/completions', {
method: 'POST',
headers: {
'Content-Type': 'application/json',
'Authorization': `Bearer ${CONFIG.apiKey}`
},
body: JSON.stringify({
model: CONFIG.model,
stream: true,
messages: [
{ role: 'system', content: CONFIG.systemPrompt },
...history
]
})
});
if (!res.ok) {
const err = await res.json();
throw new Error(err.error?.message ?? `API error ${res.status}`);
}
const { textSpan, cursorSpan } = addAIMessage('', true);
const reader = res.body.getReader();
const decoder = new TextDecoder();
let fullReply = '';
while (true) {
const { done, value } = await reader.read();
if (done) break;
const lines = decoder.decode(value).split('\n').filter(l => l.startsWith('data: '));
for (const line of lines) {
const raw = line.slice(6).trim();
if (raw === '[DONE]') break;
try {
const token = JSON.parse(raw).choices[0]?.delta?.content ?? '';
if (token) {
textSpan.textContent += token;
fullReply += token;
scrollBottom();
}
} catch { /* skip */ }
}
}
cursorSpan?.remove();
history.push({ role: 'assistant', content: fullReply });
} catch (err) {
document.getElementById('cw-thinking')?.remove();
addAIMessage(`Sorry, something went wrong: ${err.message}`, false);
} finally {
isBusy = false;
sendBtn.disabled = false;
statusTxt.textContent = 'Online';
input.focus();
}
}
// ── Input handling ──
sendBtn.addEventListener('click', send);
input.addEventListener('keydown', e => {
if (e.key === 'Enter' && !e.shiftKey) {
e.preventDefault();
send();
}
});
input.addEventListener('input', () => autoResize(input));
function autoResize(el) {
el.style.height = 'auto';
el.style.height = Math.min(el.scrollHeight, 100) + 'px';
}
// ── Unread badge — show after 3s if panel not open ──
setTimeout(() => {
if (!isOpen) badge.style.display = 'flex';
}, 3000);
function esc(s) {
return String(s)
.replace(/&/g, '&')
.replace(/</g, '<')
.replace(/>/g, '>');
}
})();Step 4 — Bundling Into One Embeddable Script
To make the widget drop into any site with one line, wrap everything in an IIFE and inject the HTML and CSS programmatically:
// chatbot-widget.js — self-contained, no dependencies
(function () {
  // 1. Inject CSS
  const style = document.createElement('style');
  style.textContent = `/* ... all widget CSS here ... */`;
  document.head.appendChild(style);

  // 2. Inject HTML
  const container = document.createElement('div');
  container.innerHTML = `/* ... widget HTML here ... */`;
  document.body.appendChild(container);

  // 3. Run the JS logic
  // ... same JS as above ...
})();
Then any site embeds it with one line:
<script src="https://your-cdn.com/chatbot-widget.js"></script>No configuration file, no build step, no framework required.
Step 5 — Customising the Widget
Every colour, font, and radius in the widget is driven by a CSS custom property (variables prefixed with --cw-). If you’re new to them, the MDN guide to CSS custom properties is the canonical reference. Change the design tokens on #chat-widget to match any site’s brand:
/* Blue theme (default) */
#chat-widget {
  --cw-primary:   #5b9cf6;
  --cw-primary-g: linear-gradient(135deg, #5b9cf6, #06d6b0);
}

/* Purple theme */
#chat-widget {
  --cw-primary:   #8b5cf6;
  --cw-primary-g: linear-gradient(135deg, #8b5cf6, #ec4899);
}

/* Orange / warm theme */
#chat-widget {
  --cw-primary:   #f59e0b;
  --cw-primary-g: linear-gradient(135deg, #f59e0b, #ef4444);
}

/* Light mode */
#chat-widget {
  --cw-bg:      #ffffff;
  --cw-surface: #f8fafc;
  --cw-surface2:#f1f5f9;
  --cw-border:  rgba(0,0,0,.08);
  --cw-text:    #0f172a;
  --cw-body:    #334155;
  --cw-muted:   #94a3b8;
}
Keeping the API Key Secure
For a public production widget, never put your API key in client-side JavaScript. The OpenAI API documentation on key safety is explicit: every key in front-end code is a leaked key. Use a backend proxy:
// Instead of calling OpenAI directly...
const res = await fetch('https://api.openai.com/v1/chat/completions', {
  headers: { 'Authorization': `Bearer ${API_KEY}` }  // ← exposed!
});

// Call your own endpoint that holds the key
const res = await fetch('/api/chat', {
  method: 'POST',
  body: JSON.stringify({ messages })
  // No API key in the browser — your server adds it
});
A Cloudflare Worker, Vercel Function, or Netlify Function acts as the secure proxy. The browser only ever talks to your domain.
Key Takeaways
- The widget is an IIFE that injects its own HTML and CSS — zero conflict with the host page
- Use CSS custom properties (
--cw-primary,--cw-bg) for one-file theming - The floating trigger uses a
::afterpulse ring animation to draw attention without being annoying - Always stream responses —
stream: truemakes the widget feel instant even for long answers - Send the full
historyarray with every request to maintain conversation context - The unread badge shows after 3 seconds if the panel is not open — a gentle nudge
- For production: proxy API calls through your backend and never expose your key
FAQ
How do I add a chatbot to my website?
Drop a single <script src="chat-widget.js"></script> tag into your HTML and the widget bootstraps itself. The IIFE pattern in this tutorial injects the HTML and CSS at runtime, so you don’t need to copy markup or stylesheets into the host page. Configure the model, system prompt, and theme by editing the CONFIG object inside the script.
Is the OpenAI API free?
No — OpenAI charges per token used. For the chatbot widget, gpt-4o-mini costs roughly $0.15 per 1M input tokens and $0.60 per 1M output tokens, which works out to a fraction of a cent per typical conversation. New accounts get free credits to start. For pricing details see the official OpenAI pricing page.
Do I need a backend to use this widget?
For learning, testing, or an internal tool, no — the browser can call OpenAI directly. For any public-facing website, yes: you need a backend proxy so your API key isn’t exposed in client-side JavaScript. A simple Cloudflare Worker, Vercel Function, or Netlify Function works.
Can I use this with Claude, Gemini, or a local LLM instead of OpenAI?
Yes. The widget’s UI is API-agnostic. Swap the fetch('https://api.openai.com/v1/chat/completions') call for the equivalent endpoint on Anthropic’s Claude API, Google’s Gemini API, or a local LM Studio / Ollama instance. The streaming logic is the same — ReadableStream works with any chunked HTTP response.
How do I make the widget responsive on mobile?
The CSS in this tutorial uses position: fixed with right: 24px and bottom: 24px on desktop, and switches to full-width / bottom-sheet styling at viewport widths below 480px. The chat panel expands to fill 90% of the screen height on mobile so users aren’t fighting a tiny window. Tweak the @media (max-width: 480px) block to adjust breakpoints.
Can the chatbot remember previous conversations?
The widget keeps the full conversation in memory while the page is open by appending each message to a history array and re-sending it with every request. To persist across page reloads, save the array to localStorage and rehydrate on load. For multi-page persistence across sessions, store the conversation server-side keyed by user ID.