The single most common question from frontend developers discovering AI: “Do I need a backend to use the OpenAI API?”
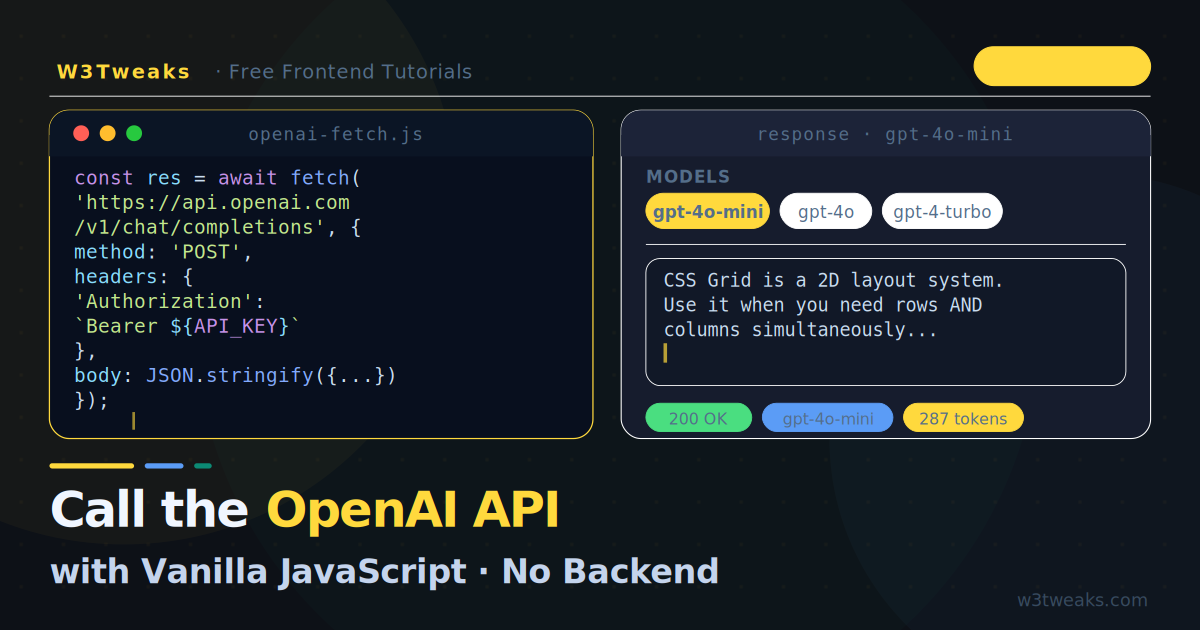
The short answer is no — not for learning, prototyping, or personal projects. You can call the OpenAI API directly from plain JavaScript using the Fetch API documented on MDN. No Node.js, no Express, no frameworks.
This tutorial covers everything from your first API call to production-ready patterns with streaming, error handling, and rate limit management. If you’re new to streaming responses specifically, the deep-dive in Build a ChatGPT-style streaming text effect with JavaScript covers the ReadableStream mechanics in detail. For a polished end-to-end product built on this API, see Build a chatbot widget with HTML, CSS & JavaScript.
Security note first: For public-facing production apps, you should never expose your API key in client-side code. We cover the correct approach at the end of this article. For personal projects, local development, and learning — the direct approach shown here is perfectly fine.
Live Demo
You need an OpenAI API key to use this demo. Your key is only used in your browser.
Prerequisites
Before writing any code, you need:
- An OpenAI account and API key (starts with
sk-) - A browser (any modern browser works)
- A basic HTML file — that is genuinely all
No npm install. No build step. No configuration files.
Your First API Call
The OpenAI chat completions endpoint accepts a POST request with a JSON body. Here is the minimal working version:
const response = await fetch('https://api.openai.com/v1/chat/completions', {
  method: 'POST',
  headers: {
    'Content-Type': 'application/json',
    'Authorization': `Bearer YOUR_API_KEY_HERE`
  },
  body: JSON.stringify({
    model: 'gpt-4o-mini',       // cheapest capable model
    max_tokens: 500,
    messages: [
      {
        role: 'user',
        content: 'Explain CSS flexbox in two sentences.'
      }
    ]
  })
});

const data = await response.json();
console.log(data.choices[0].message.content);
That is the entire API call. Paste it into your browser’s DevTools console (with your real API key), run it, and you will see a GPT response within a couple of seconds.
Understanding the Request Structure
The messages array
The messages array is the core of the API. Each message has a role and content:
messages: [
  // System message — sets the AI's behaviour and persona
  {
    role: 'system',
    content: 'You are a concise frontend development tutor. Answer in plain English without jargon.'
  },
  // Previous conversation turns (for multi-turn chat)
  {
    role: 'user',
    content: 'What is the box model?'
  },
  {
    role: 'assistant',
    content: 'The box model describes how every HTML element is a rectangular box...'
  },
  // The new user message
  {
    role: 'user',
    content: 'Now explain margin collapsing.'
  }
]
Three roles:
system— instructions for the AI (optional but powerful)user— what the human saidassistant— what the AI previously replied (used to maintain conversation history)
Choosing a model
| Model | Speed | Cost | Best for |
|---|---|---|---|
gpt-4o-mini | Fast | Very cheap | Most tasks, learning, prototyping |
gpt-4o | Medium | Moderate | Complex reasoning, code generation |
gpt-4-turbo | Slower | Expensive | Maximum capability tasks |
For this tutorial, gpt-4o-mini is the right choice — it is fast, cheap, and more than capable for typical frontend use cases.
A Complete, Working HTML Page
Here is a full, self-contained page you can save as index.html and open directly in a browser:
<!DOCTYPE html>
<html lang="en">
<head>
  <meta charset="UTF-8">
  <title>OpenAI API Demo</title>
  <style>
    body {
      font-family: system-ui, sans-serif;
      max-width: 640px;
      margin: 40px auto;
      padding: 0 20px;
      background: #0d1117;
      color: #c4d4ed;
    }
    textarea, button {
      width: 100%;
      font-family: inherit;
      font-size: 14px;
    }
    textarea {
      background: #161c2d;
      border: 1px solid rgba(255,255,255,.1);
      border-radius: 8px;
      padding: 12px;
      color: #f0f6ff;
      resize: vertical;
      min-height: 80px;
      outline: none;
      margin-bottom: 10px;
    }
    button {
      background: linear-gradient(135deg, #5b9cf6, #06d6b0);
      border: none;
      border-radius: 8px;
      padding: 12px;
      color: #fff;
      font-weight: 700;
      cursor: pointer;
    }
    button:disabled { opacity: .5; cursor: not-allowed }
    #output {
      margin-top: 20px;
      background: #161c2d;
      border: 1px solid rgba(255,255,255,.08);
      border-radius: 8px;
      padding: 16px;
      line-height: 1.75;
      min-height: 60px;
      white-space: pre-wrap;
    }
    .error { color: #f87171 }
  </style>
</head>
<body>
  <h2 style="color:#f0f6ff;margin-bottom:20px">OpenAI API — Vanilla JS</h2>

  <textarea id="prompt" placeholder="Ask anything…">Explain CSS Grid in 3 bullet points.</textarea>
  <button id="btn" onclick="ask()">Ask GPT</button>
  <div id="output">Response will appear here…</div>

  <script>
    const API_KEY = 'YOUR_API_KEY_HERE'; // ← replace this

    async function ask() {
      const prompt = document.getElementById('prompt').value.trim();
      const output = document.getElementById('output');
      const btn    = document.getElementById('btn');

      if (!prompt) return;

      btn.disabled     = true;
      btn.textContent  = 'Thinking…';
      output.textContent = '';
      output.className = '';

      try {
        const res = await fetch('https://api.openai.com/v1/chat/completions', {
          method: 'POST',
          headers: {
            'Content-Type':  'application/json',
            'Authorization': `Bearer ${API_KEY}`
          },
          body: JSON.stringify({
            model:      'gpt-4o-mini',
            max_tokens: 800,
            messages: [
              {
                role:    'system',
                content: 'You are a helpful frontend development tutor. Be concise and practical.'
              },
              { role: 'user', content: prompt }
            ]
          })
        });

        if (!res.ok) {
          const err = await res.json();
          throw new Error(err.error?.message ?? `HTTP ${res.status}`);
        }

        const data    = await res.json();
        output.textContent = data.choices[0].message.content;

      } catch (err) {
        output.textContent = `Error: ${err.message}`;
        output.className   = 'error';
      } finally {
        btn.disabled    = false;
        btn.textContent = 'Ask GPT';
      }
    }

    // Allow Enter to submit
    document.getElementById('prompt').addEventListener('keydown', e => {
      if (e.key === 'Enter' && e.ctrlKey) ask();
    });
  </script>
</body>
</html>
Save it, replace YOUR_API_KEY_HERE with your real key, and open it in any browser. No server needed.
Adding Streaming Responses
The basic approach above waits for the full response before showing anything. For a ChatGPT-style experience where text appears as it generates, add stream: true and read the response body as a ReadableStream:
async function askStreaming(prompt, outputEl) {
  const res = await fetch('https://api.openai.com/v1/chat/completions', {
    method: 'POST',
    headers: {
      'Content-Type':  'application/json',
      'Authorization': `Bearer ${API_KEY}`
    },
    body: JSON.stringify({
      model:      'gpt-4o-mini',
      max_tokens: 800,
      stream:     true,           // ← enable streaming
      messages:   [{ role: 'user', content: prompt }]
    })
  });

  if (!res.ok) throw new Error(`API error ${res.status}`);

  const reader  = res.body.getReader();
  const decoder = new TextDecoder();

  while (true) {
    const { done, value } = await reader.read();
    if (done) break;

    // Each chunk contains one or more "data: {...}" lines
    const lines = decoder.decode(value).split('\n');

    for (const line of lines) {
      if (!line.startsWith('data: ')) continue;

      const raw = line.slice(6).trim();
      if (raw === '[DONE]') return;

      try {
        const json  = JSON.parse(raw);
        const token = json.choices[0]?.delta?.content ?? '';
        if (token) {
          outputEl.textContent += token;
          // Scroll to bottom in a chat UI
          outputEl.scrollTop = outputEl.scrollHeight;
        }
      } catch {
        // Malformed chunk — skip it
      }
    }
  }
}
The key difference from the basic version:
stream: truein the request body- Reading
res.body.getReader()instead ofres.json() - Parsing each
data: {...}line individually - Extracting
delta.contentinstead ofmessage.content
Maintaining Conversation History
A single API call has no memory. To build a multi-turn chat, you must send the full conversation history with every request:
const conversation = [
  {
    role:    'system',
    content: 'You are a helpful frontend development tutor.'
  }
];

async function chat(userMessage, outputEl) {
  // Add the new user message to history
  conversation.push({ role: 'user', content: userMessage });

  const res = await fetch('https://api.openai.com/v1/chat/completions', {
    method: 'POST',
    headers: {
      'Content-Type':  'application/json',
      'Authorization': `Bearer ${API_KEY}`
    },
    body: JSON.stringify({
      model:    'gpt-4o-mini',
      messages: conversation      // ← full history every time
    })
  });

  const data  = await res.json();
  const reply = data.choices[0].message.content;

  // Add AI reply to history so next turn includes it
  conversation.push({ role: 'assistant', content: reply });

  outputEl.textContent = reply;
}
Context limit: Models have a maximum context window (how much text they can process at once).
gpt-4o-minisupports 128,000 tokens — roughly 96,000 words. For most chat applications, you will hit cost limits long before the context limit. Trim old messages from the history array if conversations become very long.
Handling Errors Properly
The OpenAI API returns structured error objects you should handle gracefully:
async function callAPI(messages) {
  let res;
  try {
    res = await fetch('https://api.openai.com/v1/chat/completions', {
      method:  'POST',
      headers: {
        'Content-Type':  'application/json',
        'Authorization': `Bearer ${API_KEY}`
      },
      body: JSON.stringify({ model: 'gpt-4o-mini', messages })
    });
  } catch (networkErr) {
    // No internet, DNS failure, CORS issue
    throw new Error('Network error — check your connection.');
  }

  if (!res.ok) {
    const body = await res.json().catch(() => ({}));
    const msg  = body.error?.message ?? `HTTP ${res.status}`;

    switch (res.status) {
      case 401: throw new Error('Invalid API key. Check your credentials.');
      case 429: throw new Error('Rate limit hit. Wait a moment and try again.');
      case 500: throw new Error('OpenAI server error. Try again shortly.');
      default:  throw new Error(msg);
    }
  }

  return res.json();
}
The four errors you will encounter most:
| Status | Meaning | Fix |
|---|---|---|
401 | Bad API key | Double-check the key, no extra spaces |
429 | Rate limit / quota exceeded | Wait, or upgrade your plan |
500 | OpenAI server error | Retry with exponential backoff |
| Network | CORS / no internet | Use a proxy for production |
Rate Limiting and Retry Logic
For production-quality code, add automatic retry on 429 errors:
async function callWithRetry(messages, retries = 3) {
  for (let attempt = 0; attempt < retries; attempt++) {
    try {
      return await callAPI(messages);
    } catch (err) {
      const isRateLimit = err.message.includes('Rate limit');
      const isLast      = attempt === retries - 1;

      if (!isRateLimit || isLast) throw err;

      // Exponential backoff: 1s, 2s, 4s
      const delay = 1000 * Math.pow(2, attempt);
      console.warn(`Rate limited. Retrying in ${delay}ms…`);
      await new Promise(r => setTimeout(r, delay));
    }
  }
}
Keeping Your API Key Secure
The approach in this tutorial (key in client JavaScript) is fine for:
- Learning and experimentation
- Local development on your own machine
- Personal projects only you access
It is not safe for public-facing sites because anyone can read your API key from the browser’s source or Network tab, then use it to run up charges on your account.
For public production apps, the correct pattern is a thin proxy:
Browser → Your Server → OpenAI APIYour server holds the key — the browser never sees it. You can implement this with:
- Cloudflare Workers — free tier, deploys in seconds, perfect for W3Tweaks
- Vercel Edge Functions —
api/chat.jsfile, zero configuration - Netlify Functions — same idea,
netlify/functions/chat.js
A minimal Cloudflare Worker proxy looks like this:
// Cloudflare Worker — wrangler.toml secret: OPENAI_API_KEY
export default {
  async fetch(request, env) {
    if (request.method !== 'POST') {
      return new Response('Method Not Allowed', { status: 405 });
    }

    const body = await request.json();

    const res = await fetch('https://api.openai.com/v1/chat/completions', {
      method:  'POST',
      headers: {
        'Content-Type':  'application/json',
        'Authorization': `Bearer ${env.OPENAI_API_KEY}`  // ← secret
      },
      body: JSON.stringify(body)
    });

    // Forward the response (including streaming) back to the browser
    return new Response(res.body, {
      headers: {
        'Content-Type':  res.headers.get('Content-Type'),
        'Access-Control-Allow-Origin': '*'
      }
    });
  }
};
Your frontend then calls https://your-worker.workers.dev/ instead of api.openai.com directly — and your key never leaves the server.
Useful Parameters to Know
body: JSON.stringify({
  model:       'gpt-4o-mini',
  messages:    [...],
  max_tokens:  500,         // cap response length (default: unlimited)
  temperature: 0.7,         // creativity: 0 = deterministic, 2 = very random
  top_p:       1,           // alternative to temperature — usually leave at 1
  stream:      true,        // enable token-by-token streaming
  n:           1,           // number of responses to generate
  stop:        ['\n\n'],    // stop generating at this sequence
  user:        'user-123',  // for abuse monitoring — your app's user ID
})
temperature is the one you will tune most often:
0.0— deterministic, always the same answer. Good for code, facts.0.7— balanced creativity. Good for explanations and chat.1.2— more varied and creative. Good for writing and brainstorming.
Key Takeaways
- The OpenAI API is a standard HTTPS endpoint — any language with
fetchcan call it - Use
gpt-4o-minifor most tasks — it is fast, cheap, and highly capable - Add
stream: trueand readres.body.getReader()for ChatGPT-style streaming - Send the full
conversationarray on every request to maintain chat history - Handle
401,429, and500errors explicitly — they all need different responses - Use exponential backoff when retrying rate-limited requests
- For production: proxy API calls through a Cloudflare Worker, Vercel, or Netlify function — never expose your key in client-side code
FAQ
Can I really call the OpenAI API from the browser without a backend?
Yes, for personal projects and learning. The OpenAI API is a standard HTTPS endpoint and the browser’s fetch() can call it directly. The only constraint is your API key has to live somewhere — for local development that can be hardcoded, for personal tools you can prompt the user to paste their own key. For any public-facing app, you must proxy through a backend so the key isn’t exposed.
Why does the OpenAI request need an Authorization header?
The Authorization: Bearer <key> header is how OpenAI authenticates the request. Each API key is tied to a billing account, so OpenAI uses the header to know which account to charge. The OpenAI API authentication docs cover the full spec. The key is read on every request, never cached server-side, so rotating a leaked key takes effect immediately.
What’s the cheapest OpenAI model for a small project?
gpt-4o-mini is the current sweet spot: roughly $0.15 per million input tokens and $0.60 per million output tokens. For most apps that works out to fractions of a cent per request. New accounts also get free trial credits. The older gpt-3.5-turbo is similar in price but noticeably less capable — there’s no good reason to pick it for new projects.
How do I add streaming to OpenAI API calls?
Add stream: true to the request body. Instead of await res.json(), read the response body as a ReadableStream: const reader = res.body.getReader(), then loop calling await reader.read() until done. Each chunk arrives as Server-Sent Events formatted like data: {...} — parse each line, extract the choices[0].delta.content field, append to the DOM. The streaming text effect article walks through this in full.
What does the “401 Unauthorized” error mean?
The API key in your Authorization header is invalid, revoked, or for the wrong organization. Three things to check: (1) the key starts with sk- and matches what’s in your OpenAI dashboard; (2) you haven’t hit your usage limit (which silently kills the key for the rest of the billing period); (3) you’re not accidentally sending the key from a forked codebase that has a different key embedded. Generate a fresh key in the dashboard if in doubt.
How do I keep the conversation context across multiple API calls?
OpenAI’s API is stateless — each call is independent. To maintain a conversation, you send the entire message history with every request: an array of {role, content} objects alternating between user and assistant. Start with a system message, append every user input and AI response to the array, send the whole thing on the next call. There’s a token limit (~128k for gpt-4o) — trim or summarize older messages once you approach it.