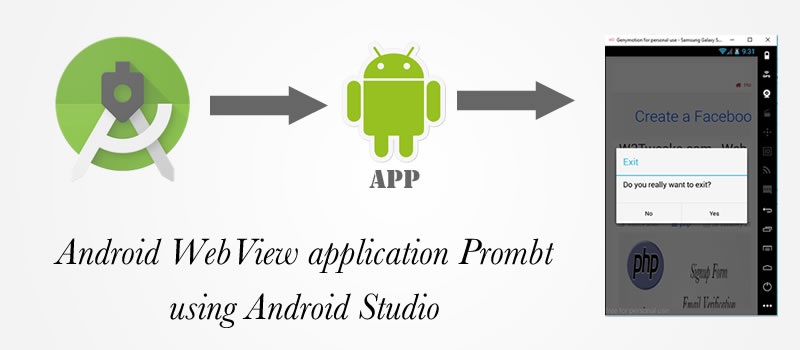
Now a days everyone have android phone and they are like to everything when it has application. So here I share with you how to make website in application with different activities like prompt box, loading icon and much more make beautiful look in your app.
WebView is the concept of make android application in android studio environment & eclipse. Everyone make doing this concept, because it’s very simple to deploy the activities. If you have website or blog?? Now time to make your website in application way.
Android WebView Application Prompt
The webview concept easy way to finish our requirements. There is no extra added plugin in Gradle, default way to we have execute this script. I want some functionality in my application when its starting, loading, refreshing, confirming & etc. So here I could be used progress bar in the webview concept.
Steps to follow make WebView
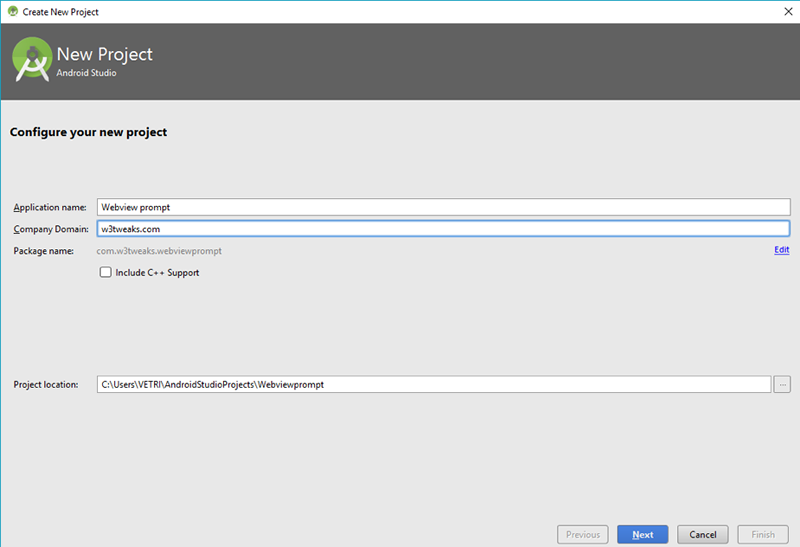
First, open android studio create new project & you have any name in the project field that’s no matter like this
Then click Next, hereafter you have to choose minimum SDK version or no change it’s defaultly take minimum SDK version so no problem now click Next like this

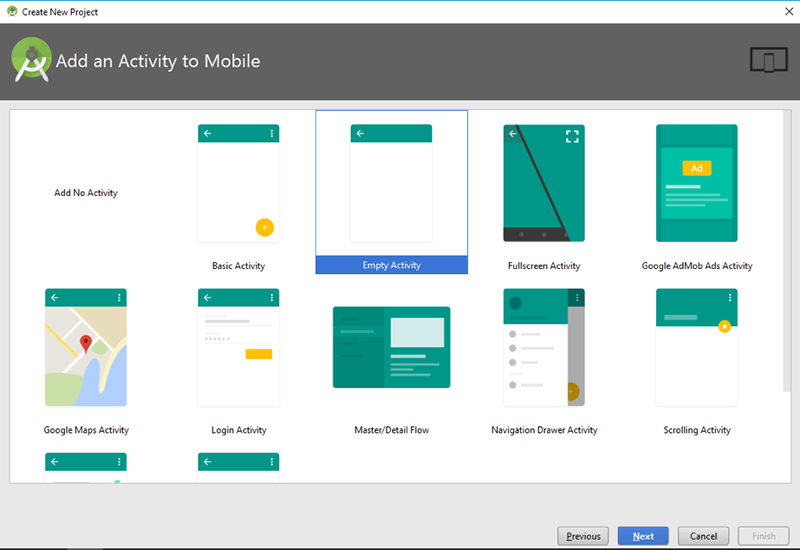
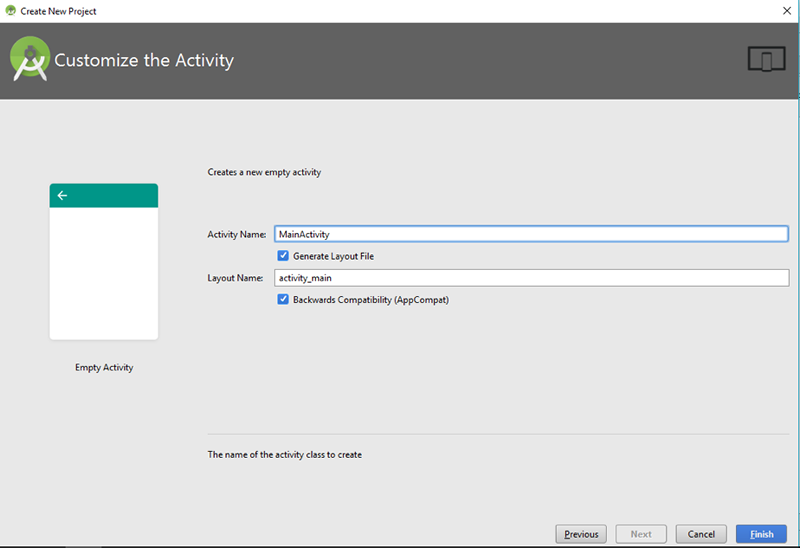
Hereafter choose the Empty Activity then click Next
Then the Activity Name & Layout Name will be showing, there is no change in text box just clickFinish
Now your Android WebView project is Successfully created.
Now open the app -> res -> layout -> activity_main.xml file. Then replace the following code in your activity_main.xml file.
The code is,
`<?xml version="1.0" encoding="utf-8"?>
<RelativeLayout xmlns:android="http://schemas.android.com/apk/res/android"
    xmlns:tools="http://schemas.android.com/tools"
    android:id="@+id/activity_main"
    android:layout_width="match_parent"
    android:layout_height="match_parent"
    android:paddingBottom="@dimen/activity_vertical_margin"
    android:paddingLeft="@dimen/activity_horizontal_margin"
    android:paddingRight="@dimen/activity_horizontal_margin"
    android:paddingTop="@dimen/activity_vertical_margin"
    tools:context="com.w3tweaks.webviewprompt.MainActivity">

    <ProgressBar
        android:layout_centerHorizontal="true"
        android:layout_height="wrap_content"
        android:layout_width="wrap_content"
        android:layout_gravity="center_vertical|center_horizontal"
        android:id="@+id/progressBar1"/>

    <TextView
        android:layout_below="@+id/progressBar1"
        android:layout_height="wrap_content"
        android:id="@+id/LoadingText"
        android:layout_width="fill_parent"
        android:text="Loading, Please Wait.."
        android:textSize="20sp"
        android:gravity="center_horizontal">
    </TextView>

    <WebView
        android:id="@+id/activity_main_webview"
        android:layout_width="wrap_content"
        android:layout_height="wrap_content"/>
</RelativeLayout>`
Finally, the activity_main.xml look like this,

Now the WebView & ProgressBar designing is successfully configured in our activity_main.xml file.
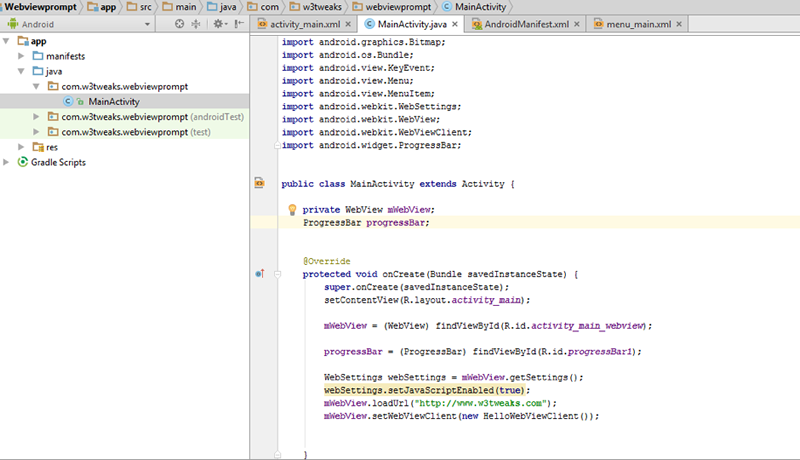
Hereafter, move on app - > java -> MainActivity.java and replace the following code in your MainActivity.java file.
The code is,
`package com.w3tweaks.webviewprompt;
import android.app.Activity;
import android.app.AlertDialog;
import android.content.DialogInterface;
import android.graphics.Bitmap;
import android.os.Bundle;
import android.view.KeyEvent;
import android.view.Menu;
import android.view.MenuItem;
import android.webkit.WebSettings;
import android.webkit.WebView;
import android.webkit.WebViewClient;
import android.widget.ProgressBar;
public class MainActivity extends Activity {
private WebView mWebView;
ProgressBar progressBar;
@Override
protected void onCreate(Bundle savedInstanceState) {
super.onCreate(savedInstanceState);
setContentView(R.layout.activity_main);
mWebView = (WebView) findViewById(R.id.activity_main_webview);
progressBar = (ProgressBar) findViewById(R.id.progressBar1);
WebSettings webSettings = mWebView.getSettings();
webSettings.setJavaScriptEnabled(true);
mWebView.loadUrl("http://www.w3tweaks.com");
mWebView.setWebViewClient(new HelloWebViewClient());
}
private class HelloWebViewClient extends WebViewClient{
@Override
public void onPageStarted(WebView view, String url, Bitmap favicon) {
// TODO Auto-generated method stub
super.onPageStarted(view, url, favicon);
}
@Override
public boolean shouldOverrideUrlLoading(WebView webView, String url)
{
webView.loadUrl(url);
return true;
}
@Override
public void onPageFinished(WebView view, String url) {
// TODO Auto-generated method stub
super.onPageFinished(view, url);
progressBar.setVisibility(view.GONE);
}
}
@Override
public boolean onKeyDown(int keyCode, KeyEvent event)
{ //if back key is pressed
if((keyCode == KeyEvent.KEYCODE_BACK)&& mWebView.canGoBack())
{
mWebView.goBack();
return true;
}
return super.onKeyDown(keyCode, event);
}
@Override
public boolean onCreateOptionsMenu(Menu menu) {
// Inflate the menu; this adds items to the action bar if it is present.
getMenuInflater().inflate(R.menu.menu_main, menu);
return true;
}
@Override
public boolean onOptionsItemSelected(MenuItem item) {
// Handle action bar item clicks here. The action bar will
// automatically handle clicks on the Home/Up button, so long
// as you specify a parent activity in AndroidManifest.xml.
int id = item.getItemId();
//noinspection SimplifiableIfStatement
if (id == R.id.action_settings) {
return true;
}
return super.onOptionsItemSelected(item);
}
public void onBackPressed() {
AlertDialog.Builder alertDialogBuilder = new AlertDialog.Builder(
MainActivity.this);
// set title
alertDialogBuilder.setTitle("Exit");
// set dialog message
alertDialogBuilder
.setMessage("Do you really want to exit?")
.setCancelable(false)
.setPositiveButton("Yes",new DialogInterface.OnClickListener() {
public void onClick(DialogInterface dialog,int id) {
// if this button is clicked, close
// current activity
MainActivity.this.finish();
}
})
.setNegativeButton("No",new DialogInterface.OnClickListener() {
public void onClick(DialogInterface dialog,int id) {
// if this button is clicked, just close
// the dialog box and do nothing
dialog.cancel();
}
});
// create alert dialog
AlertDialog alertDialog = alertDialogBuilder.create();
// show it
alertDialog.show();
}
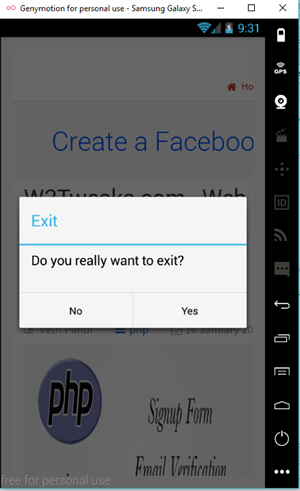
}`Finally, it’s look like
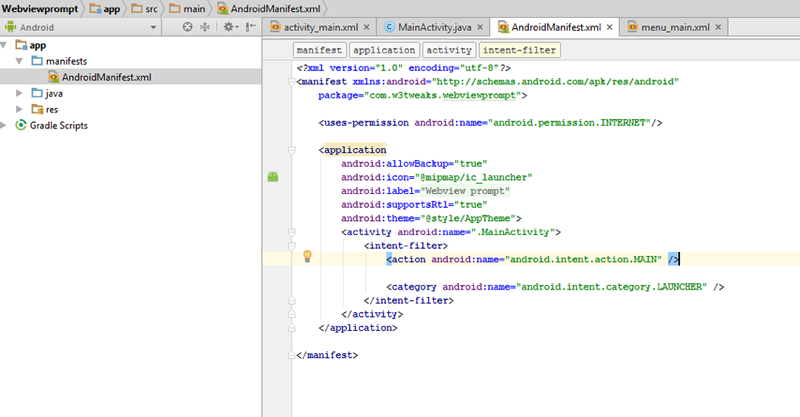
Almost all coding development is completed. Finally add the Internet Permission code in AndroidManifest.xml
The code is,
<uses-permission android:name="android.permission.INTERNET"/>Just replace this code in AndroidManifest.xml file.
The final code of AndroidManifest.xml is,
`<?xml version="1.0" encoding="utf-8"?>
<manifest xmlns:android="http://schemas.android.com/apk/res/android" package="com.w3tweaks.webviewprompt">
    <uses-permission android:name="android.permission.INTERNET"/>
    <application
        android:allowBackup="true"
        android:icon="@mipmap/ic_launcher"
        android:label="@string/app_name"
        android:supportsRtl="true"
        android:theme="@style/AppTheme">
        <activity android:name=".MainActivity">
            <intent-filter>
                <action android:name="android.intent.action.MAIN" />
                <category android:name="android.intent.category.LAUNCHER" />
            </intent-filter>
        </activity>
    </application>
</manifest>`
Finally, it’s look like
Run the Application
Now time to run your application in Android Emulator. Finally the output look like,
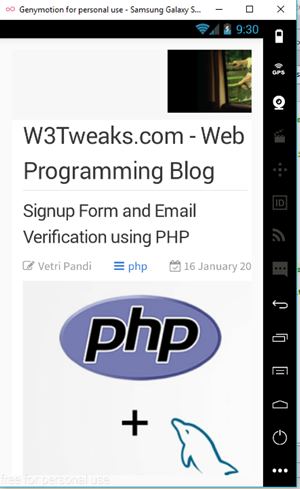
The prompt look like,
That’s all. If you have any doubt regarding this, feel free to comment below we will discuss via comment.